

~!~ Mikrotik with Cisco VLAN made easy ~!~
 ~!~ For Beginners ~!~
Virtual LANs (VLANs) are a solution to allow you to separate users into individual network segments for security and other reasons. VLAN membership can be configured through software instead of physically relocating devices or connections. VLANs allow you to break up devices on your network regardless of their location.
The main advantage of VLAN are
- Broadcast Control
- Security / Client Isolation
- DMZ
- Controlled Network Management
- Costing
TASK:
To avoid broadcasting/flooding and above all for better better management +security and monitoring, we want to break the network in smaller segments.Scenario:
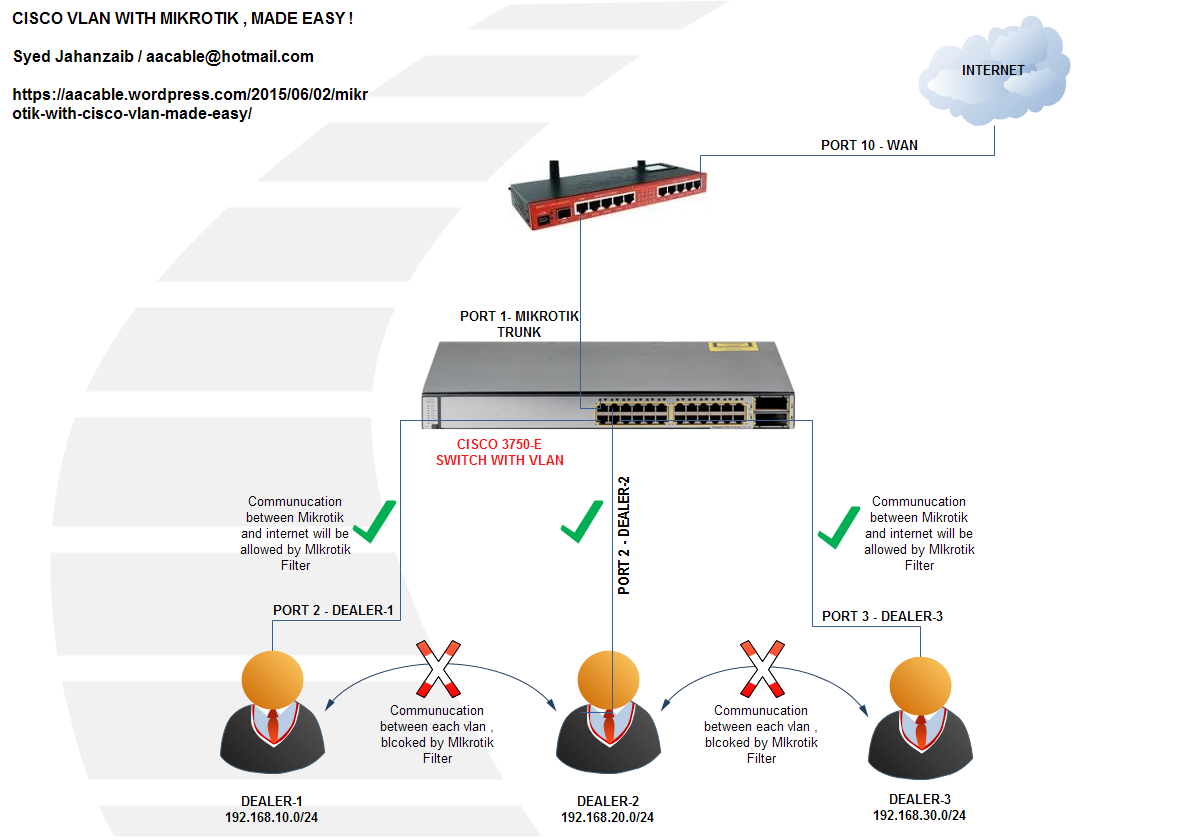
Consider the following scenarioWe have Mikrotik Router which is acting as a DHCP and PPPoE Server as well. and we want to isolate the different network areas by breaking them in smaller segments. Each area will get different IP series from the mikrotik dhcp server.
In this example following ports are used for
- Mikrotik = Port 1 [as TRUNK port]
- Dealer-1 = Port 2
- Dealer-2 = Port 3
- Dealer-3 = Port 4
Hardware Used in this Guide:
- Mikrotik RB2011
- Cisco 3750-E Series
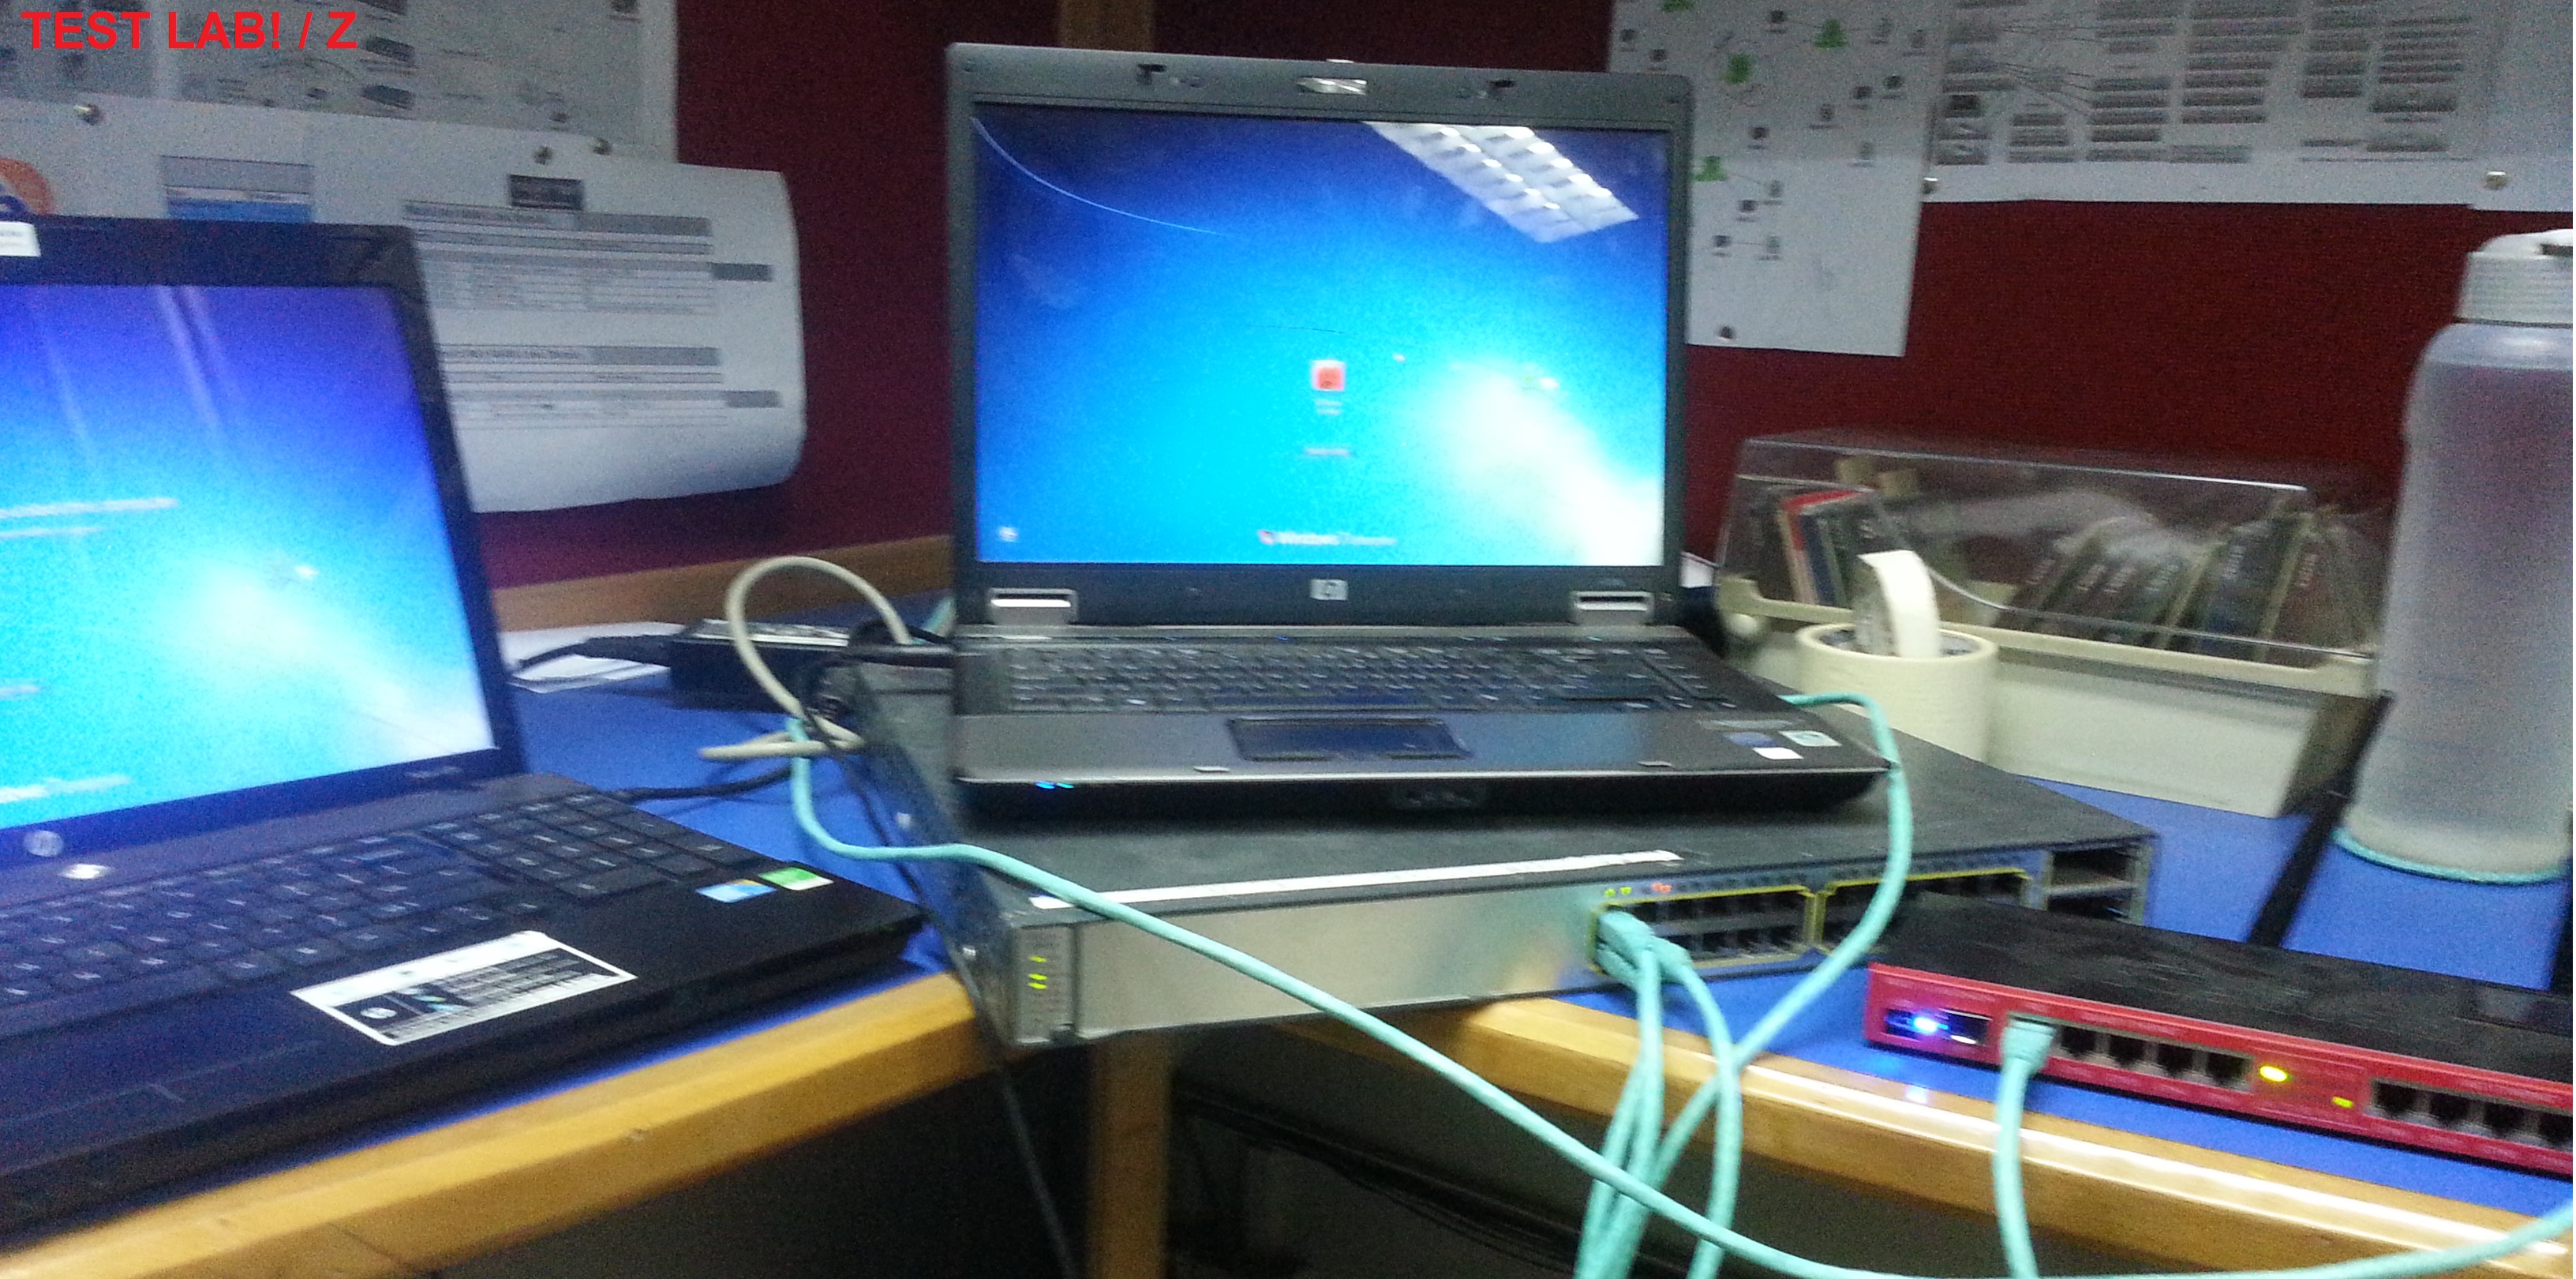
- Two Laptops for testing
MIKROTIK CONFIG
1
2
3
4
5
6
7
8
9
10
11
12
13
14
15
16
17
18
19
20
21
22
23
24
| # Create VLAN Interfaces and provide them name and VLAN#ID/interface vlanadd interface=LAN l2mtu=1594 name=DEALER-1 vlan-id=10add interface=LAN l2mtu=1594 name=DEALER-2 vlan-id=20add interface=LAN l2mtu=1594 name=DEALER-3 vlan-id=30# Assign IP addresses to the interfaces/ip addressadd address=192.168.1.1/24 interface=LAN network=192.168.1.0add address=192.168.10.1/24 interface=DEALER-1 network=192.168.10.0add address=192.168.20.1/24 interface=DEALER-2 network=192.168.20.0add address=192.168.30.1/24 interface=DEALER-3 network=192.168.30.0# Create DHCP Server and assign different Pools for the dealers# You can DHCP wizard as well if CLI is a bit hectic/ip dhcp-serveradd address-pool=DEALER-1-POOL disabled=no interface=DEALER-1 lease-time=6h name=dhcp1add address-pool=DEALER-2-POOL disabled=no interface=DEALER-2 lease-time=6h name=dhcp2add address-pool=DEALER-3-POOL disabled=no interface=DEALER-3 lease-time=6h name=dhcp3/ip dhcp-server networkadd address=192.168.10.0/24 dns-server=192.168.10.1 gateway=192.168.10.1add address=192.168.20.0/24 dns-server=192.168.20.1 gateway=192.168.20.1add address=192.168.30.0/24 dns-server=192.168.30.1 gateway=192.168.30.1 |
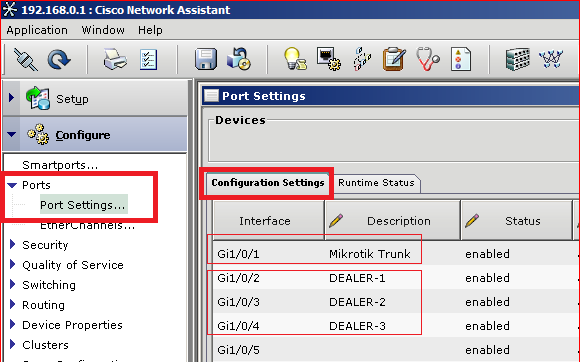
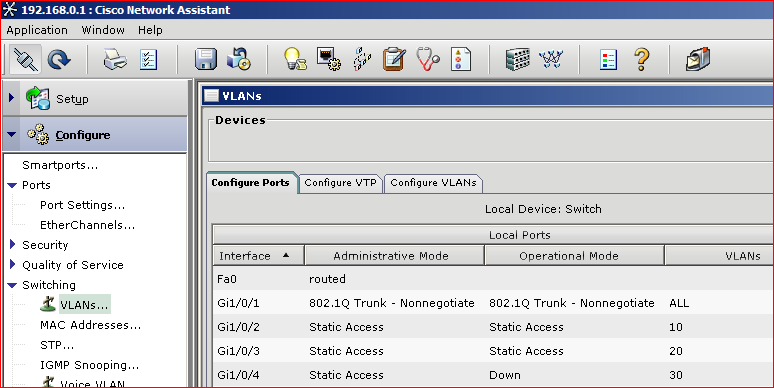
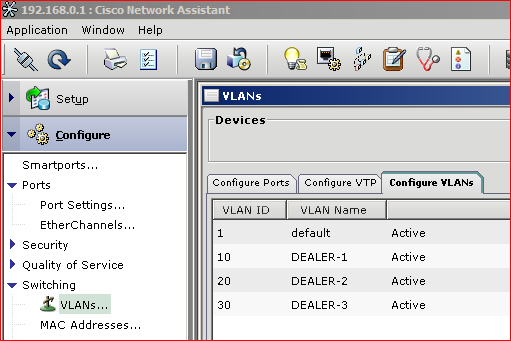
Done. Now we have to create VLANs at CISCO Switch…
CISCO VLAN CONFIGURATION
I assume that you have Cisco switch with any IP address for the management purposes.Telnet to the switch
telnet 192.168.0.1
1
2
3
4
5
6
7
8
9
10
11
12
13
14
15
16
17
18
19
20
21
22
23
24
25
26
27
28
29
30
31
32
33
34
35
36
37
38
39
40
41
42
43
44
45
46
47
48
49
| # Enter your Cisco switch passwordUser Access VerificationPassword: xxxxxx# Switch to change modeenablePassword: xxxxxxxxx# Enter in Config modeconfig t# Select Port number which will be connected with the Mikrotik and change encapsulation methodinterface gigabitEthernet 1/0/1switchport trunk encapsulation dot1qswitchport mode trunkswitchport trunk allowed vlan allswitchport nonegotiate#Create VLAN id and name for dealers/areasvlan 10name DEALER-1vlan 20name DEALER-2vlan 30name DEALER-3exit# Now Select Dealer1 interface , like port 2 and assign it with the vlan idinterface gigabitEthernet 1/0/2# OR RANGE like interface range gigabitEthernet 1/0/1-4 (Port Range 1 to 4)switchport mode accessswitchport access vlan 10interface gigabitEthernet 1/0/3switchport mode accessswitchport access vlan 20interface gigabitEthernet 1/0/4switchport mode accessswitchport access vlan 30exitexit# SAVE the configuration you just made abovewr |
Done!
TEST!
Now connect your PC with the port 2 and port3 , 4You will get different IP in each port.
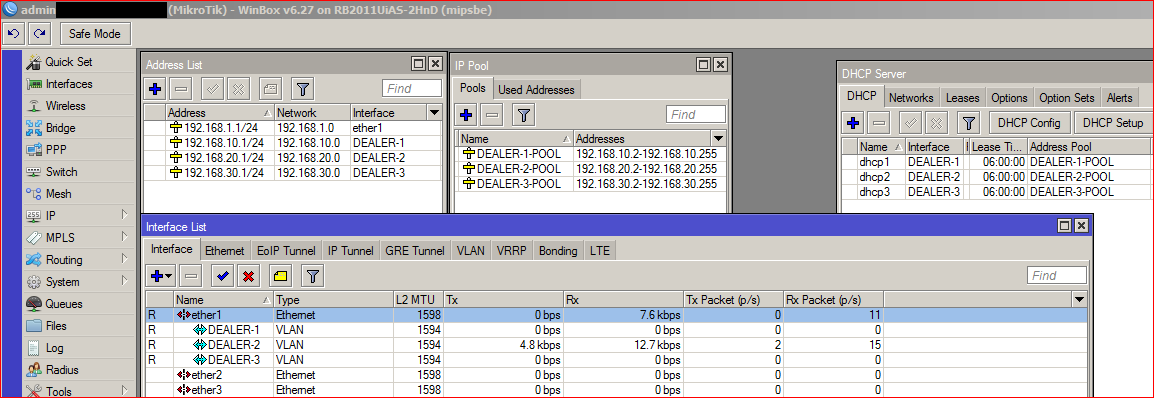
As showed in the image below from mikrotik dhcp server’s
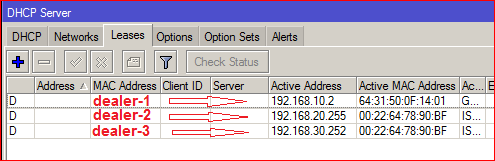
Test From Dealer-1 System

Dealer-1 have receive 192.168.10.x series ip, exactly the one we configured in mikrotik.
Now try to ping any dealer-2 series and to the internet as well. You will see that you will be able to ping the internet and mikrotik LAN ip, but not with dealer-2 subnet or likewise.
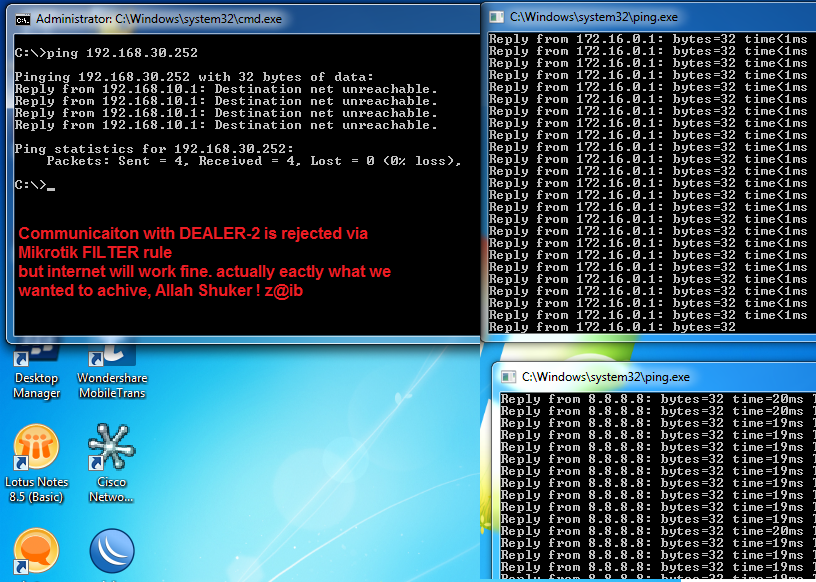
NOTE: For the client isolation / to block communication between all VLAN’s , you must create FILTER rule as explained in TIP’s n TRICK section below …
TIP’S n TRICKS
1- Block communication between all or specific VLAN Subnet
It is usually required to block all communication between specific or all VLAN subnets for security or other reasons. By default mikrotik will allow communications between all vlan. You can block them by creating FILTER rules. Example is we want that users of all vlans can access internet via WAN interface but should not be able to communicate with any other VLAN subnet. use following as an exampleNote: there are many other ways to achieve this either at switch level or mikrotik, i am showing just an example only here.
1
2
3
4
5
6
7
8
9
| /ip firewall filteradd chain=forward comment="Accept traffic from VLAN subnets to WAN" out-interface=WANadd action=reject chain=forward comment="Block Communication between all vlan subnets" reject-with=icmp-net-prohibited src-address=\192.168.0.1-192.168.255.255# Masquerade rule to allow internet , wan link interface/ip firewall natadd action=masquerade chain=srcnat out-interface=WAN |
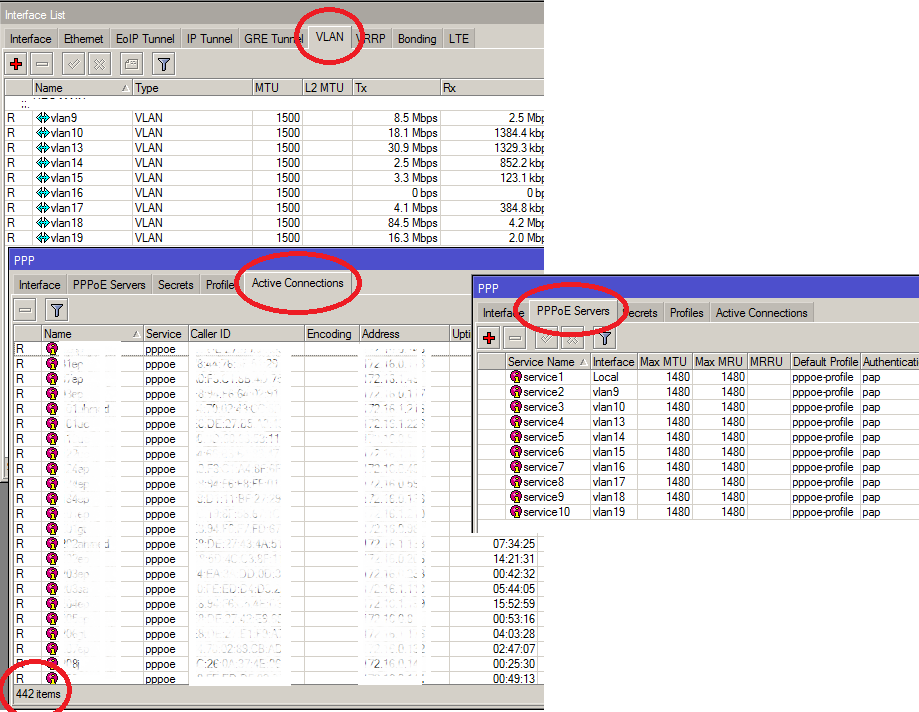
Snapshots of Working VLAN config with pppoe server
Pending work:
– Add pppoe or hotspot configuration
– Firewall configuration for isolation in pppoe/hotpost
– Few more tips n tricks with VLAN


0 comments:
Post a Comment